心血来潮,想自己搭个项目试试,锻炼下架构相关的东东。其中的一步就是搭建maven私服,方便自己部署私包。
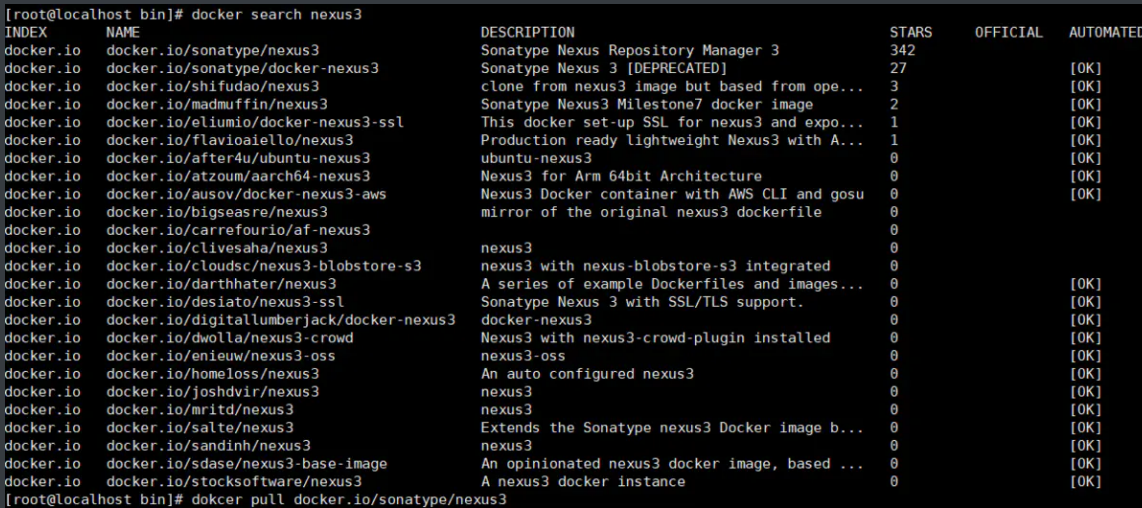
查找nexus3镜像
1 | docker search nexus3 |
拉取nexus3镜像
1 | docker pull docker.io/sonatype/nexus3 |

查看镜像
1 | docker images |

启动容器
1 | docker run -tid -p 8081:8081 --privileged=true --name nexus3 -v $PWD/nexus-data:/var/nexus-data --restart=always docker.io/sonatype/nexus3 |
-tid :创建守护式容器 。
-p 8081:8081 :宿主机端口(对外访问端口):容器映射端口。
这2个端口可不一样。浏览器访问URL用前面个端口 。
—privileged=true :容器访问宿主机的多级目录时可能会权限不足,故给 root 权限 。
—name nexus3 :给容器取名,可任意设定。
-v $PWD/nexus-data:/var/nexus-data :
把容器中的 nexus-data 目录挂载到宿主机当前路径下的 nexus-data 下。
方便以后查看相关数据。
$PWD :取当前路径。此处可以写死为某个完整的确定的目录。
挂载格式为: -v 宿主机目录 :容器目录 。
—restart=always :服务挂后,自动重启 。
docker.io/sonatype/nexus3 :镜像名 。
启动容器2
1 | docker run -id --privileged=true --name=nexus3 --restart=always -p 8081:8081 -v /kichun/nexus3/nexus-data:/var/nexus-data 6e9721ad473a(这个是容器id或名称) |
解释:
-id 创建守护式容器
—privileged=true 授予root权限(挂载多级目录必须为true,否则容器访问宿主机权限不足)
—name=名字 给你的容器起个名字
-p 宿主机端口:容器端口映射
-v 宿主机目录:容器目录 目录挂载

注意:
运行容器后访问主机+配置的宿主机映射端口无反应时,请稍等几分钟(视配置时间长短不一),等待nexus3完成初始化才能访问成功
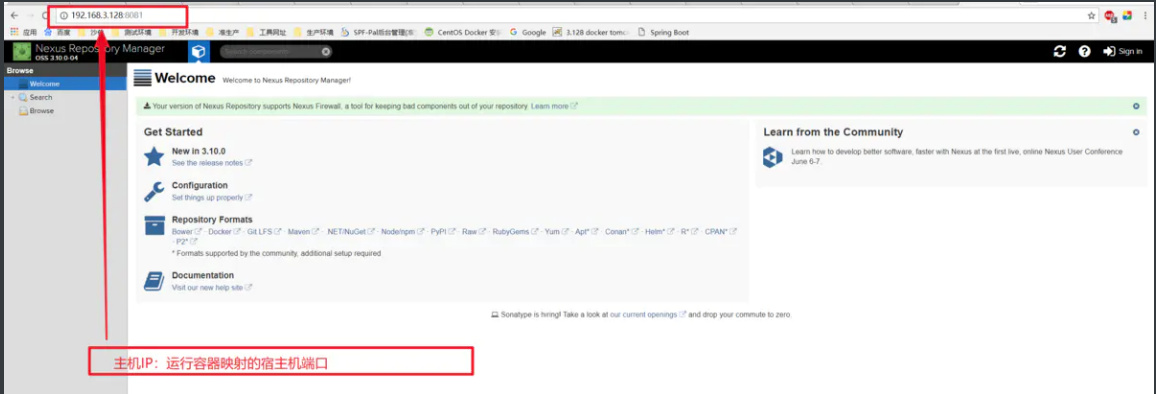
访问nexus3
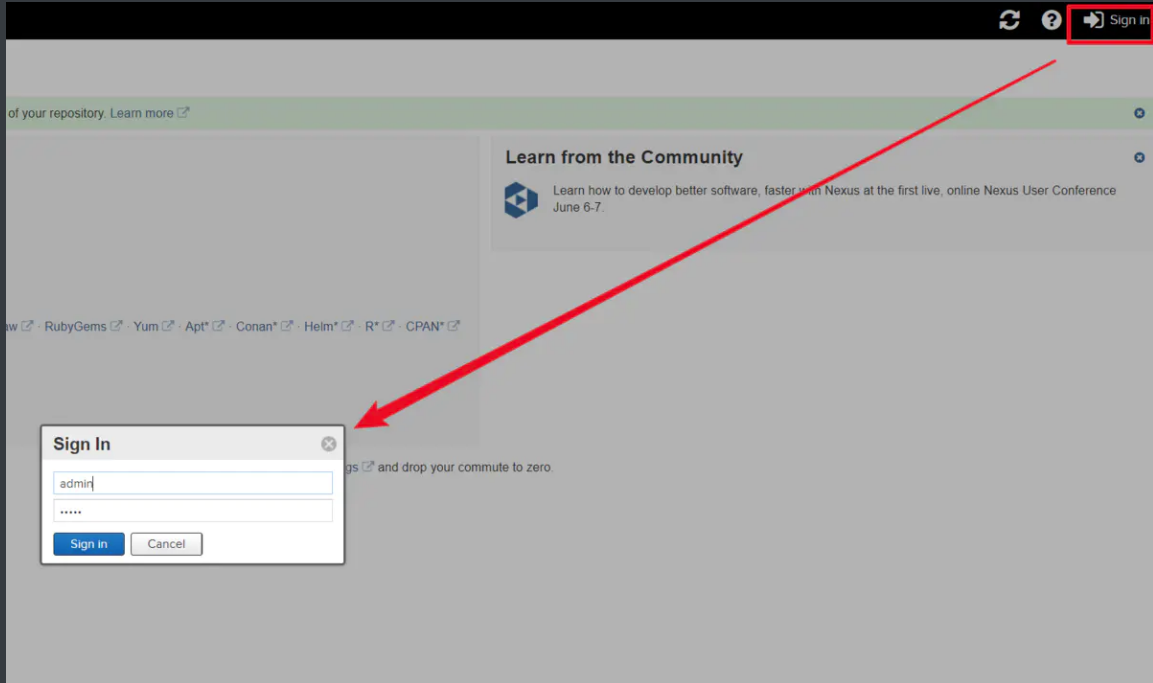
登录
默认admin密码admin123
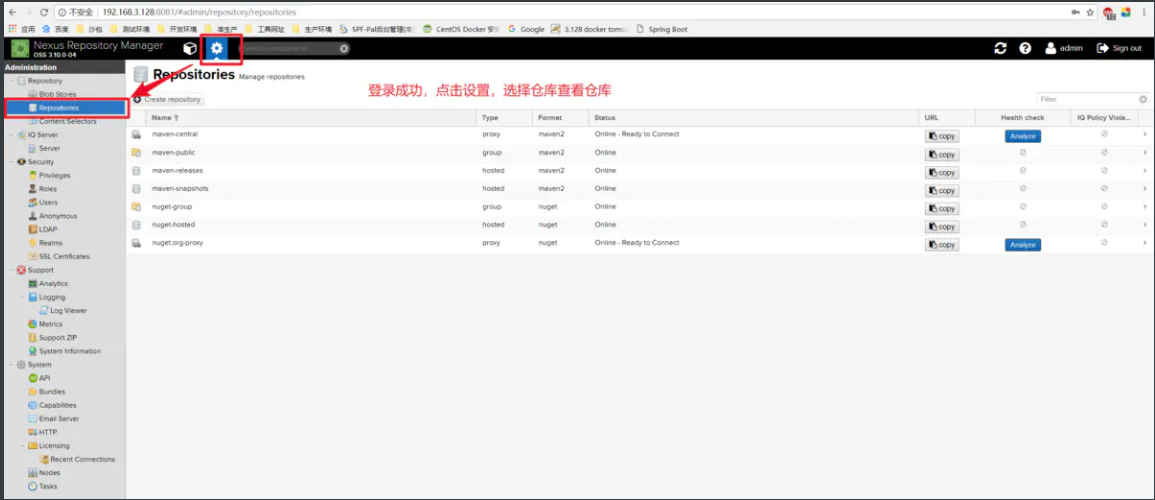
查看仓库
在项目中配置私服
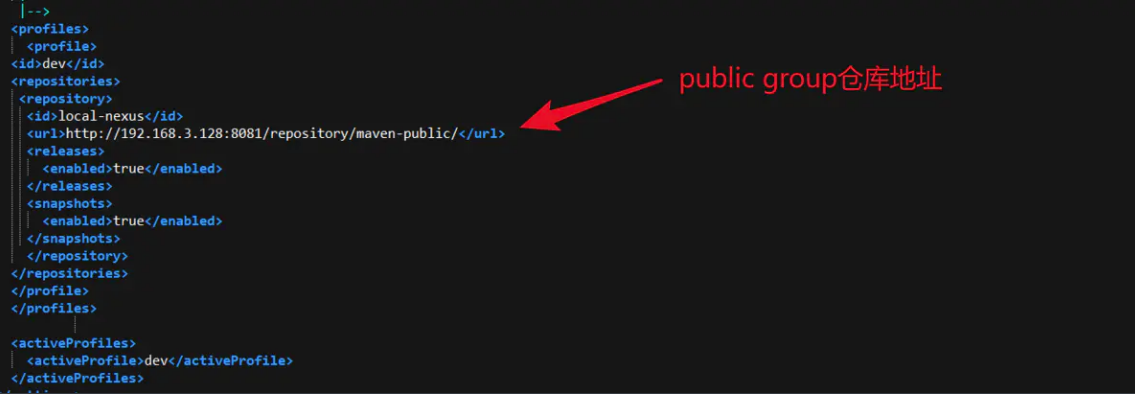
拷贝public仓库地址

配置到你本地maven的settings文件
注意:是public group仓库地址而不是releases或snapshots仓库,public默认包含了这两个仓库
1 | <profiles> |
配置maven settings文件的服务器用户名密码
注意:id为私服中releases和snapshots仓库名,必须一致
1 | <!-- servers |

在项目父pom文件中配置部署环境,注意id及URL必须与nexus仓库对应
1 | <!--私服仓库--> |

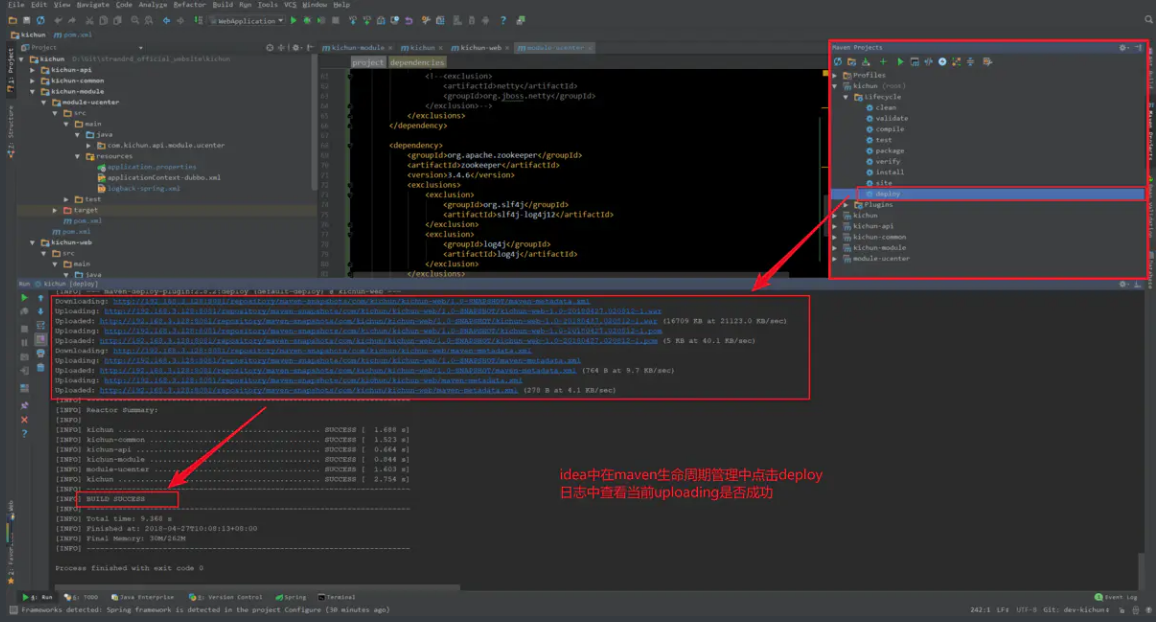
重新打开项目,对需要的模块进行deploy
在nexus中查看上传的jar
PS:
遇到问题1:
在启动容器时我原本想换个端口,但发现不用 8081 时,tcp 的端口映射也是自动设置为 8081 的。并且换了端口后,虽然能启动容器成功,显示为运行状态,但是浏览器始终访问不到服务,报错:拒绝连接。最后还是使用了 8081 端口。
遇到问题2:
登陆时始终报错,账号或密码不对,默认密码并不是 admin123。
对此解决方法见文章: ( Docker 方式运行 Nexus3 登陆密码不为 admin123 、重置登陆密码)
遇到问题3:
容器内部的时间比服务器时间晚 8 小时。
解决方法:启动容器时 加入参数: -v /etc/localtime:/etc/localtime:ro 。ro:只读。
完整启动命令为:
1 | docker run -tid -p 8081:8081 --privileged=true --name nexus3 -v $PWD/nexus-data:/var/nexus-data -v /etc/localtime:/etc/localtime:ro --restart=always docker.io/sonatype/nexus3 |
遇到问题4:
执行 mvn deploy 命令报错:


...
...
Copyright 2021 sunfy.top ALL Rights Reserved